Flickering-free Timelapses with Free Software
This is an article in a serie I do on timelapse photography using free softwares. A common issue with timelapse photography is the flickering. As lighting conditions changes during the capture of the timelapse, exposure settings of the camera can change from one picture to the next. When the lighting conditions are more or less stable a solution can be to use completely manual settings, thus preventing such changes. But, when you want to capture sunrise or sunset which have conditions literaly ranging from night to day. In this article, I will present my current workflow based on free and open-source software. I use darktable, an excellent open-source raw developer and photography application and ffmpeg to assemble and compress the final video.
Capture
Capturing is not the main focus of the present article, however it is quite important that you shoot in RAW, it's required by the module we will use in darktable in post-processing. It's a good habit to shoot in RAW if you want to maximise your ability to post-process pictures, the downside being that it requires more storage (and processing time). In order to shoot a timelapse you need an intervalometer, i.e., a way to shoot pictures at regular interval:
- The easiest is to buy a remote control that provides this ability
- Another way is to use a laptop with tethering (free softwares such as dartkable or entangle allow it), several photography softwares (potentially the one that ships with your camera) provide this feature as well.
- Otherwise you can also use a modified firmware for certains cameras (CHDK for canon compact camera, magiclantern for some Canon reflex cameras, or 400dplus for the 400D), but this is outside of the scope of this article. It can be risky because because it can break your camera, but it's also powerful because you can use dedicated scripts running directly on your camera.
Processing
For the processing step, we will process one image and then to copy the steps to all other images.
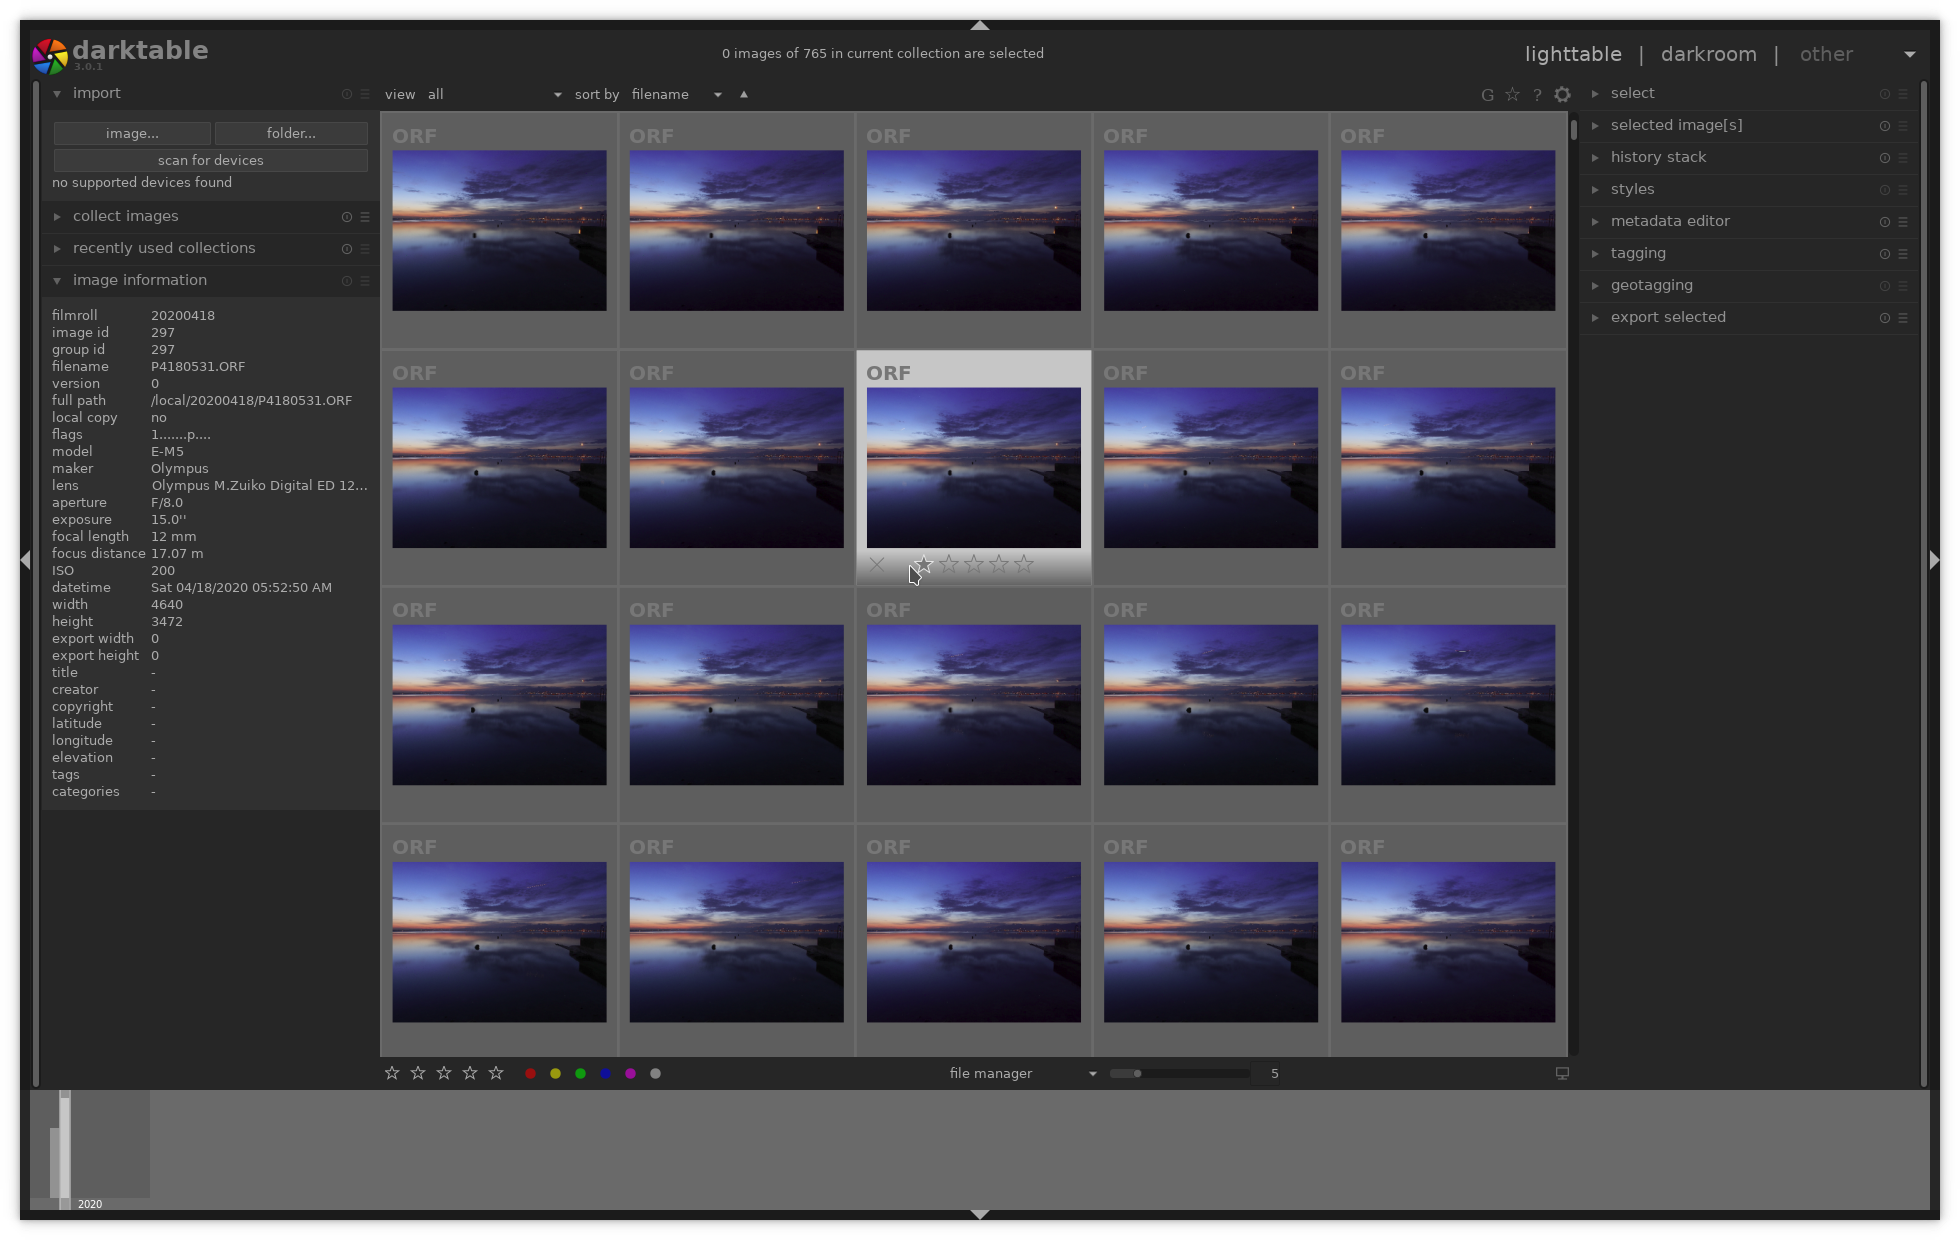
First, we import the serie in darktable, in this example I have 765 pictures taken at dawn by the lake in my hometown in Switzerland. In the lighttable view we see all our pictures, we can review our import and exclude pictures you do not want to include in the sequence.
We select now an image in our sequence, and will process it in the darkroom view. In order to remove flickering we will use the exposure module in darktable with the automatic settings.
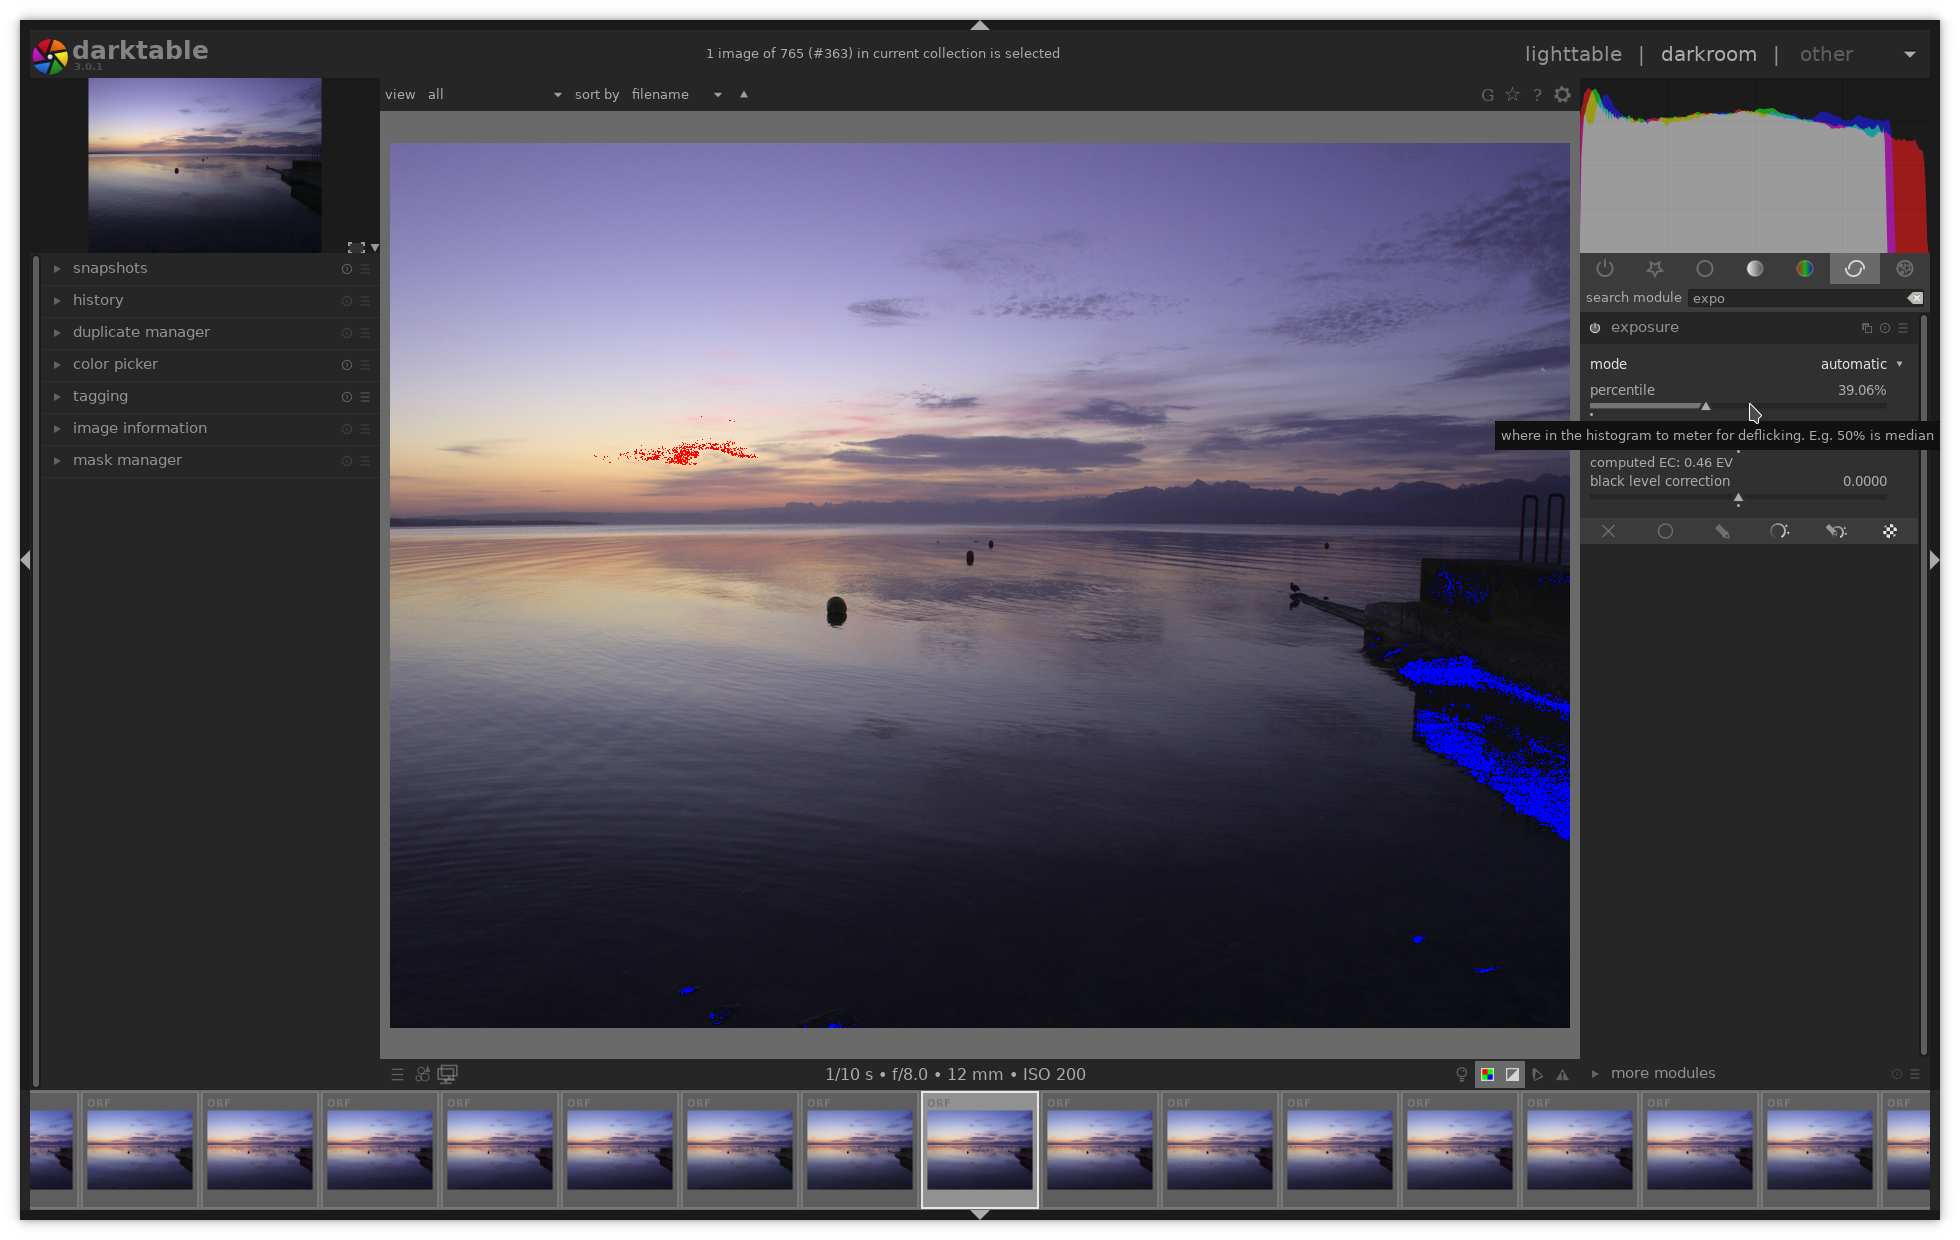
In that mode darktable computes the exposure correction based on the raw histogram (as explained https://www.darktable.org/usermanual/en/modules.html#exposure). Since this computation is automatic and based on a fix point in the histogram (i.e. a chosen percentile), the result will be very close enough to remove the flickering from our series. We tune the percentile and target level and check the histogram on top, to avoid having too much over-exposed or under-exposed pixels.
We can continue the post-processing, in our case we will apply lens
correction, and crop to 16:9 format which is common for video. 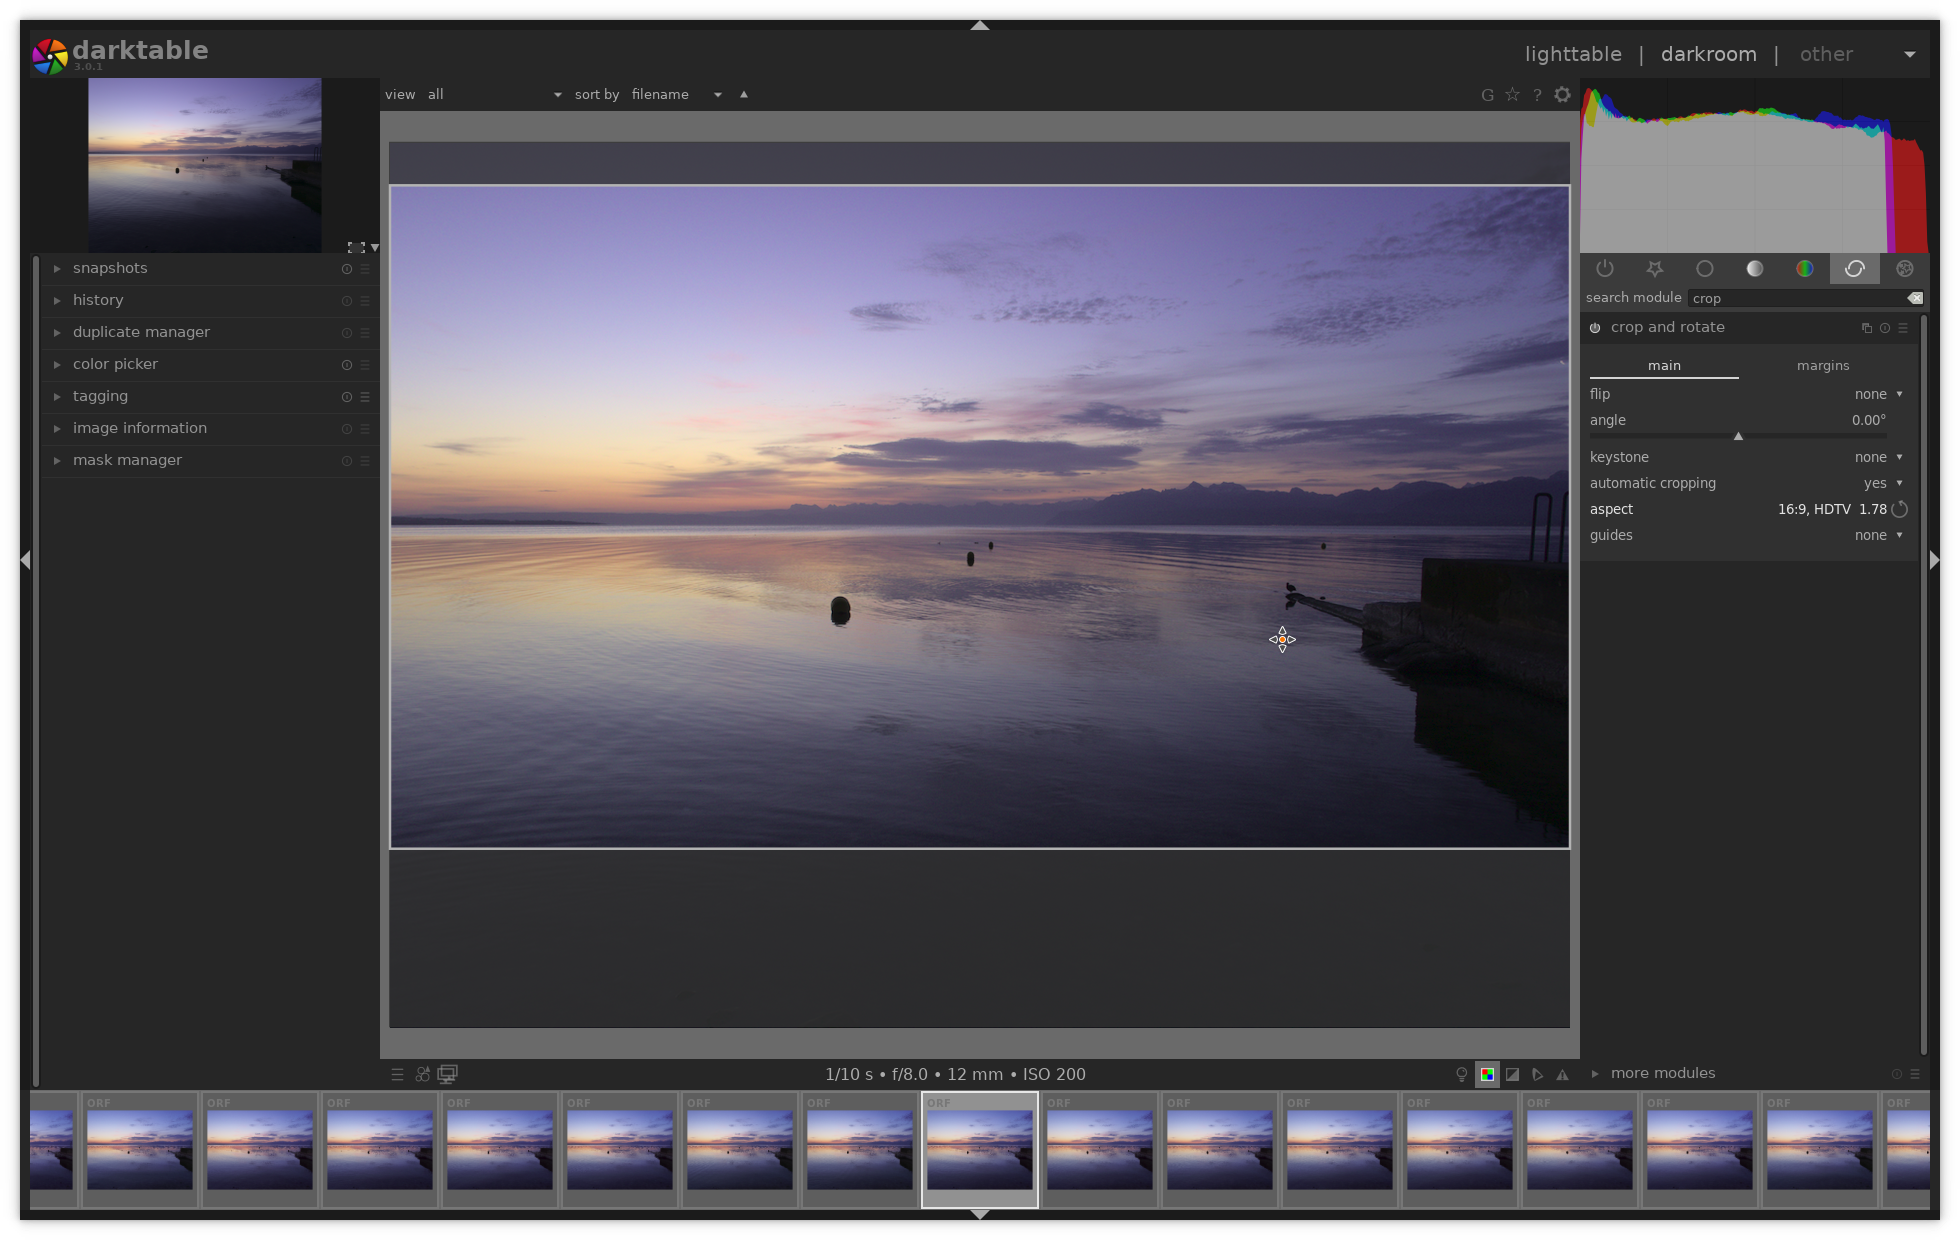
Once we are satisfied with the result, we can go back to the lighttable view. Keep the image you just processed selected and on the right under "history stack" choose "copy all", this copy all the steps we applied in the darkroom; now we select all the images that we want in our timelapse, and use "paste all" to apply the same steps.
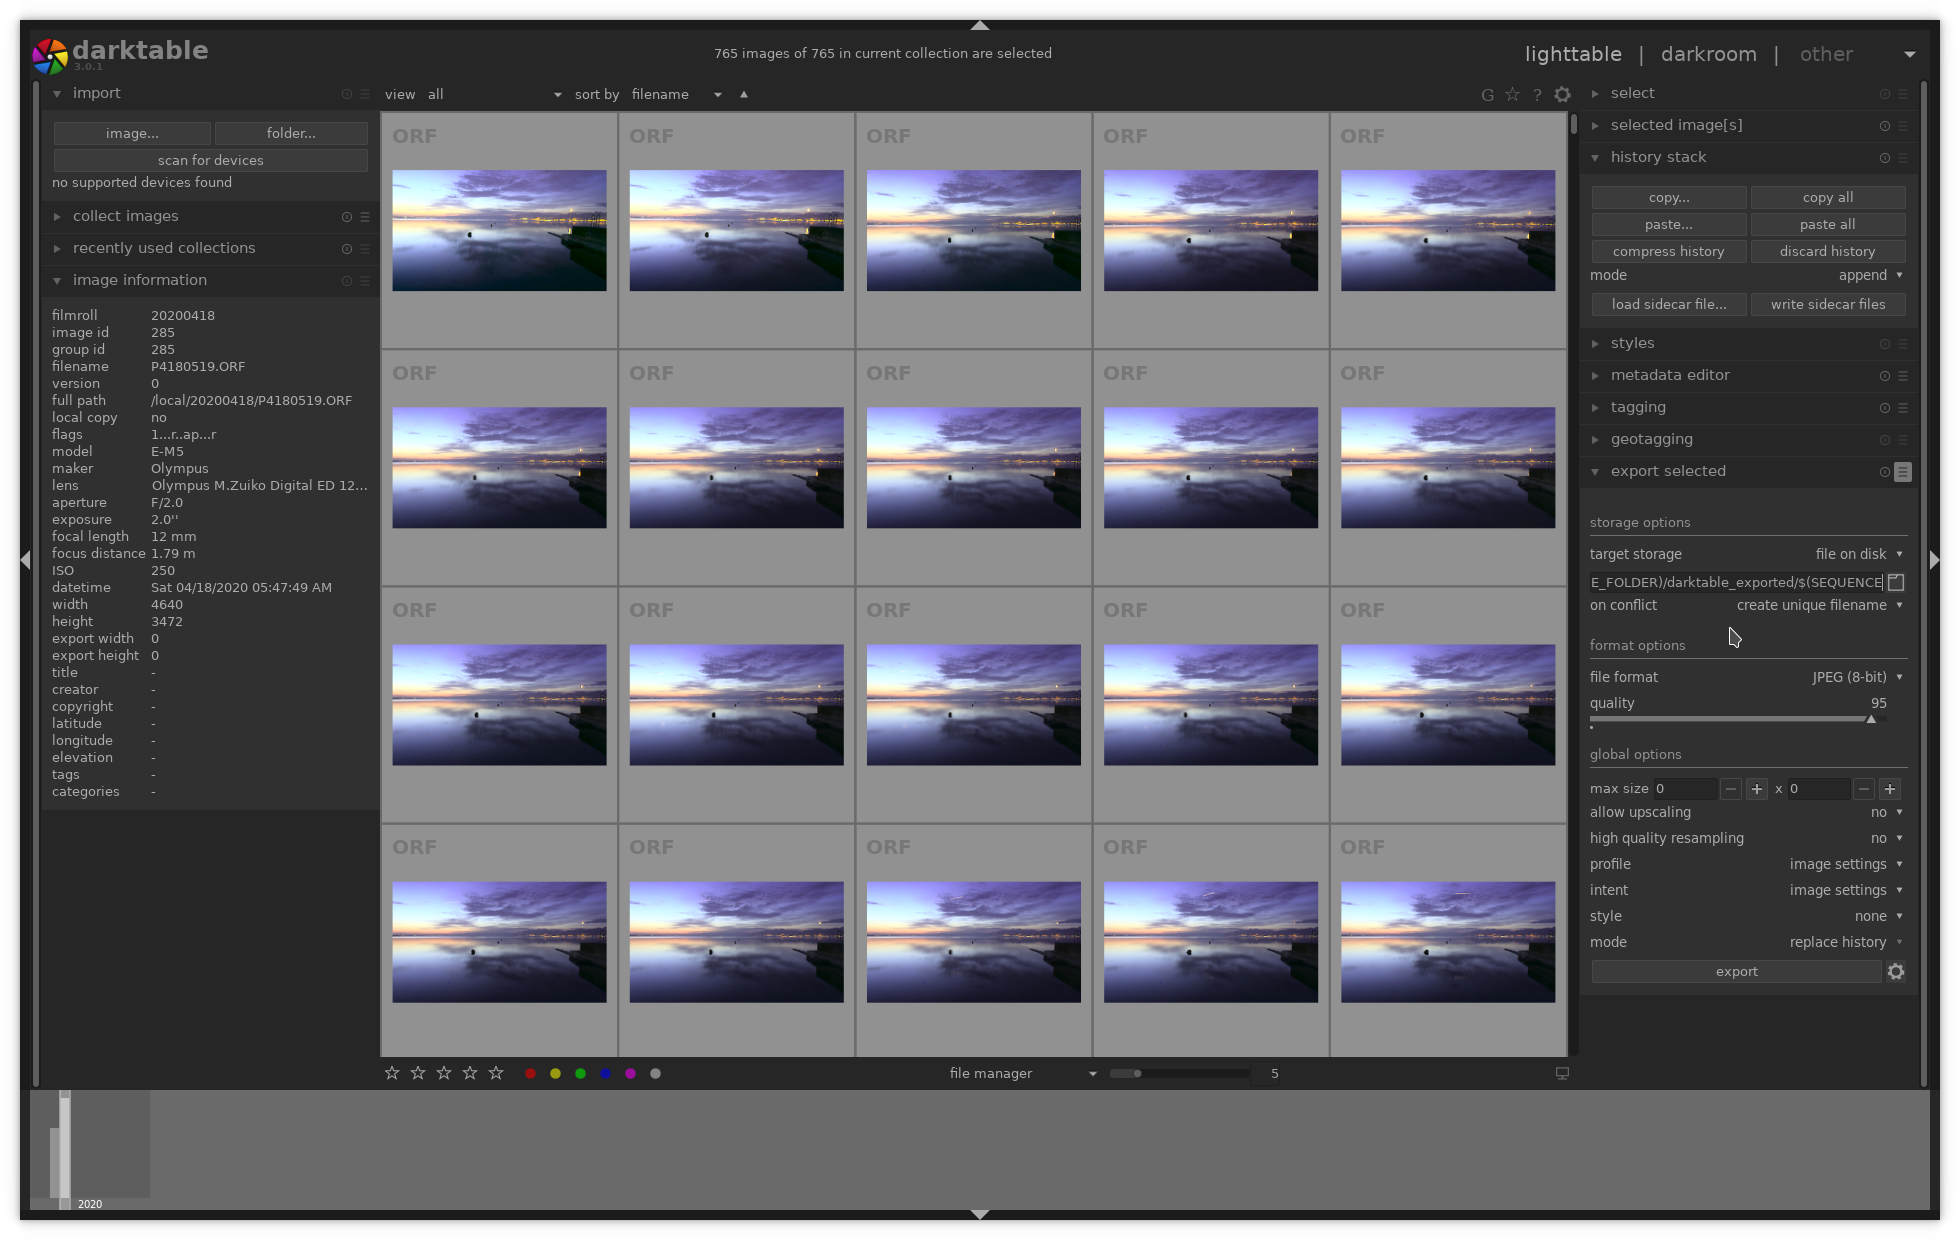
We can now export our image sequence to jpeg. On the right we select
"export selected", darktable can rename exported images using some
variables. We use $(SEQUENCE) in the filename in order to
include a sequence number. Depending on which software you use for
assembling the video, this can be skipped.
Create the video
We come to the last step which is assembling and crompressing the video from the image sequence. In that example we will use ffmpeg to perform the task. It's pretty easy if you are familiar with the command line. There are plenty of other options, for more advanced video sequence editing job, we could use blender, this could be explained in a later article.
ffmpeg -i darktable_exported/%04d.jpg -vf scale=1920:1080 -crf
            18 -vcodec libx264 -movflags +faststart timelapse.mp4
We used the following options:
-vfis to apply a filter here we want to scale to full hd 1920x1080- -
crfis the constant rate factor, 18 is close to lossless (see https://trac.ffmpeg.org/wiki/Encode/H.264) -vcodecin the codec we use-movflags +faststartinclude metadata in the beginning of the file (useful for viewing the video in the browser)
We have seen how free software can help us assembling high quality timelapses and remove the annoying flickering. We focuses on the processing steps in darktable, in following articles we could discuss other free softwares such as alternatives firmwares for capture and video sequence editing in blender.